How We Contribute to Homebrew
Homebrew
Homebrew (or brew) is one of the biggest repo on Github with more than 29k stars, 14k forks and 1k watches. It was started by Max Howell in 2009 to build the missing package manager for OS X. Back to before 2009, in Mac OSX, if we wanted to install something, we had to install it via pkg files or bin files. We didn’t have anything fancy like apt-get in Ubuntu or yum in Fedora. MacPort was an only option but it was not too good. Check the very old article about it: Homebrew, the perfect gift for command line lovers
For now, you can access homebrew via
- Homepage: http://brew.sh
- Github: https://github.com/Homebrew/homebrew
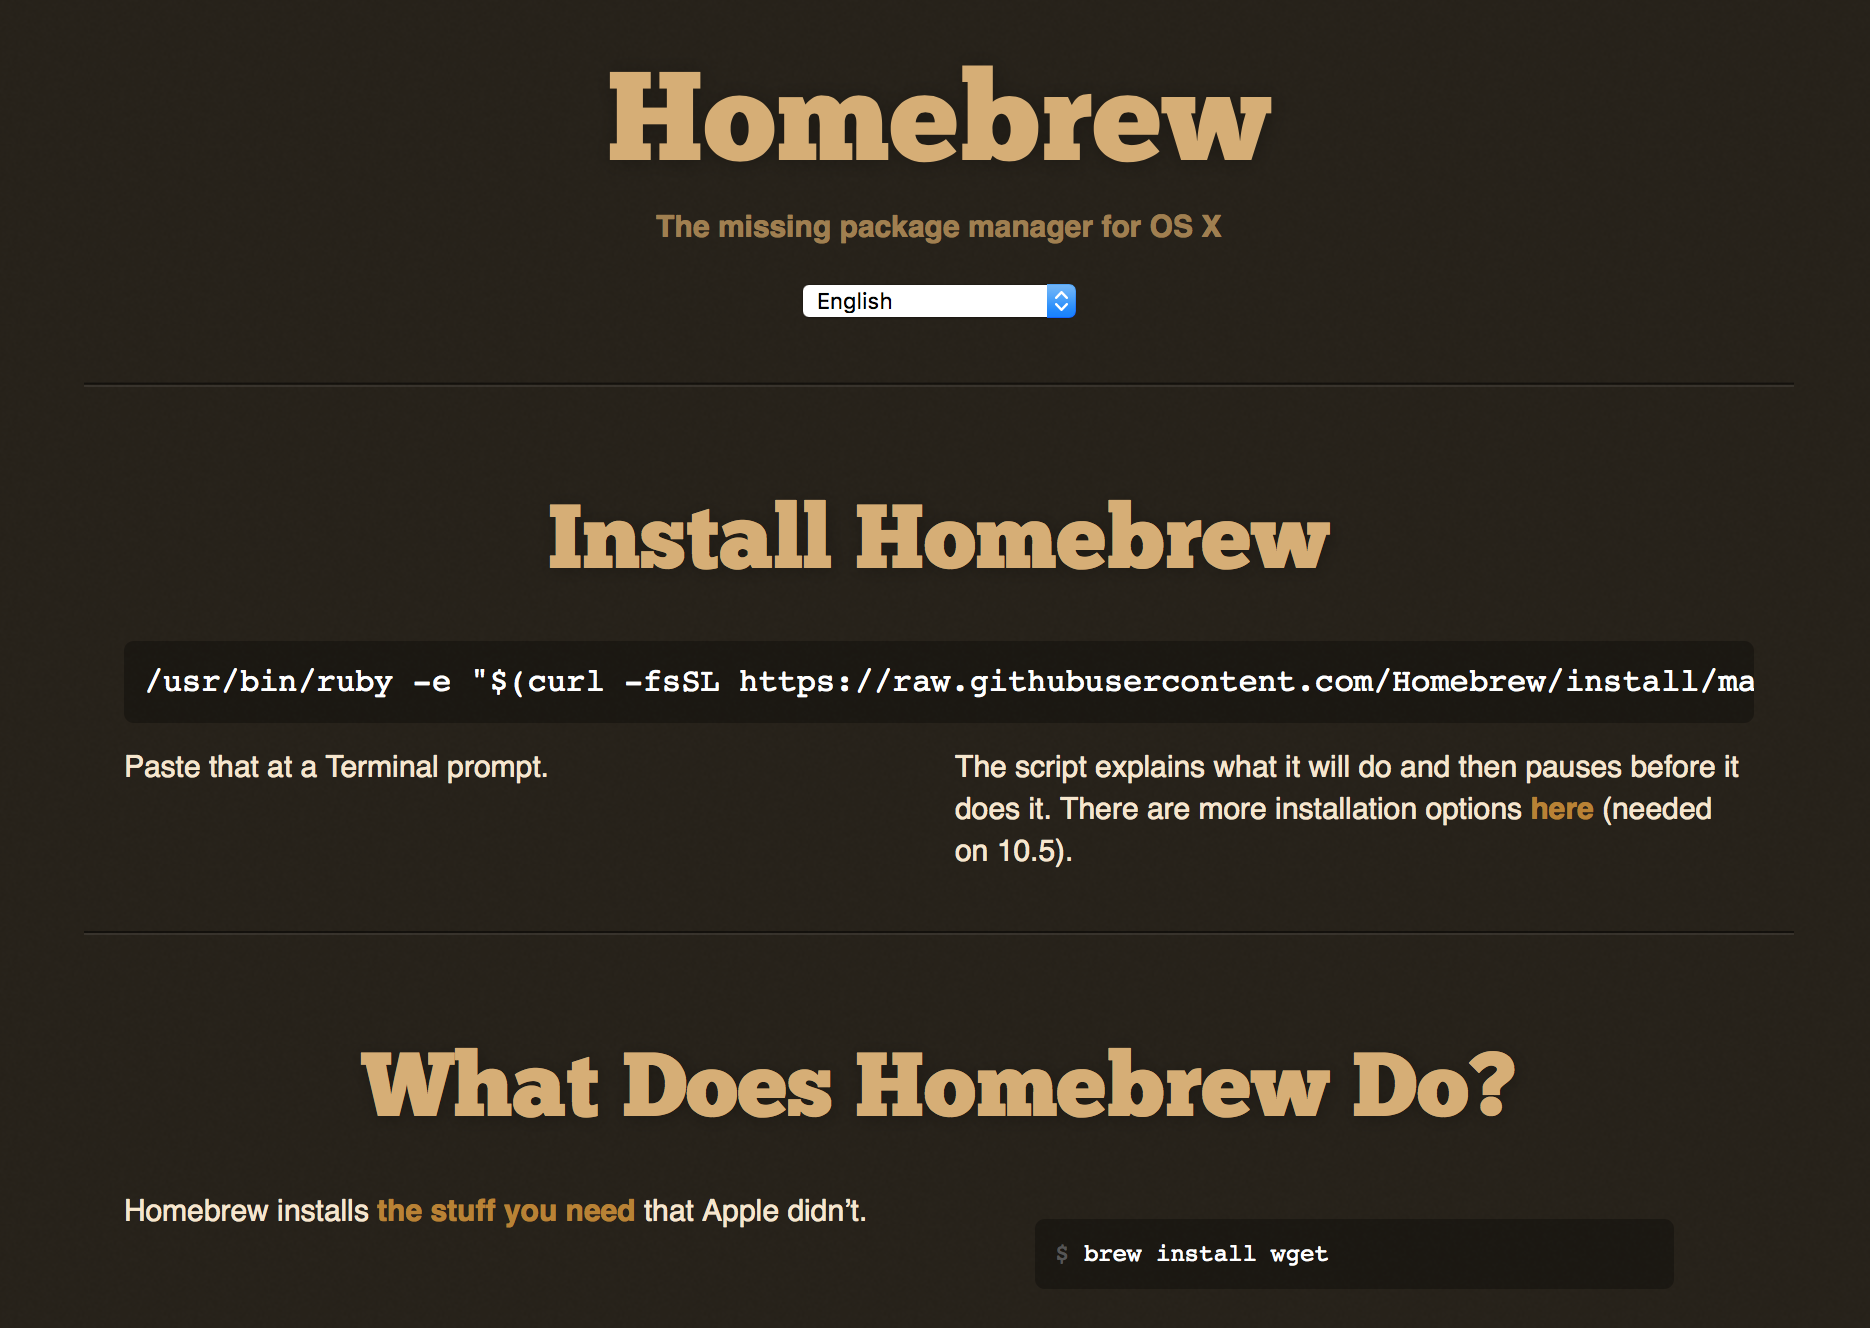
To install homebrew, you just need to run the ruby script and you will get brew command ready in couple of minutes.
1
| |
Homebrew is developed in Ruby and its program will be defined as a formula which is simple Ruby script. Most of tools can be found in Homebrew such as: docker, ruby, python, ansible, todo.txt, … At this time they have over 3k5 formulas that was contributed by community.
1 2 3 4 5 6 7 8 9 10 | |
Simple use cases for Homebrew after you got it:
1 2 | |
Brew makes it really easy to update and upgrade. Because everything is based on Git, you just need to run those below commands then everything will be done automatically.
1 2 | |
How to contribute to Homebrew
Note: In this post, we just cover the command line or tool part of Homebrew. The example is taken from our glod-cli
When you look into the repo of Homebrew, you can easily find the doc directory in homebrew/share/doc/homebrew/ which contains all the information. The most important file for this tutorial is the Formula-Cookbook.md.

Basically, when you use homebrew, it will create a separate folder on your machine. Everything usually will be installed in /usr/local/Cellar and all formulas was stored at /usr/local/Library/Formula.
So in short, if you want to contribute a new one, you need to create a new formula in your local and submit a pull request to https://github.com/Homebrew/homebrew.
Fork from homebrew
For us, we will have a repo called dwarvesf/homebrew which we can clone and start from there.
Create new formula
Make sure you have installed brew on your machine (you have to!) and your new formula must meets all their Acceptable Formulae requirements.
Then we can start from create a new branch (like git workflow) or not. For us we skip it and use the master branch (plot twist: we forgot to do this step)
We move to the step of create new formula by run the command
1
| |
Example for us, we use the archive url of our github repo https://github.com/dwarvesf/glod-cli/archive/1.0.3.2.tar.gz. You can get it by combining
1
| |
This command will help to create a local formula in /usr/local/Library/Formula and open with your default $EDITOR. You have to write a small Ruby script to install and test the formula. You can refer to other formulas to make it easier. Check out the main repo https://github.com/Homebrew/homebrew/tree/master/Library/Formula or the forked one. If you have Go formula like us, you can easily search for more than 100 existed Go formulas. It’s a great source for references.
Our formula looks like this
1 2 3 4 5 6 7 8 9 10 11 12 13 14 15 16 17 18 19 20 21 22 23 24 25 26 27 28 29 30 31 32 33 34 35 | |
Install / Debug local formula
1
| |
This command will help to install your formula at /usr/local/Library/Formula. Happy debugging until you can install it smoothly.
Sometimes you will need to uninstall the formula, you can use this command
1 2 | |
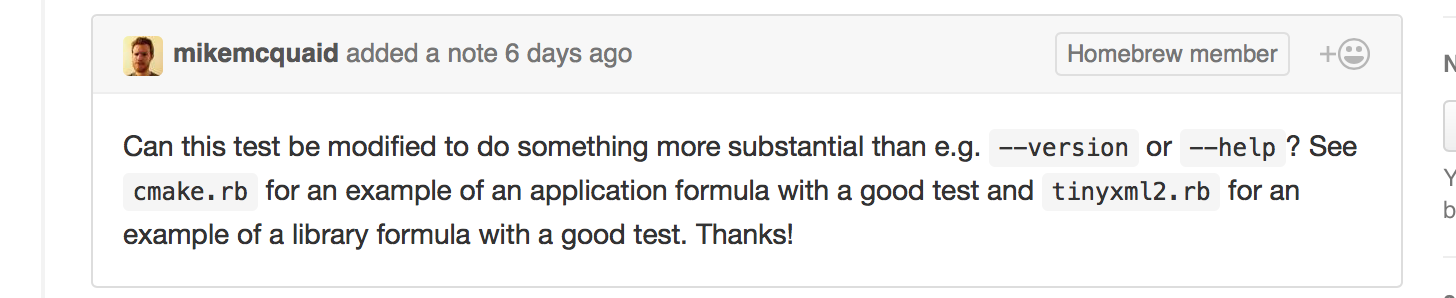
Test the formula
One note for the test block, there are still a lot of formula that try to cheat by printing out the help or version. As a good contributor, you should write good tests for your formulas or your pull request will be rejected (like us)
1 2 | |
Those tests should be passed to make sure your formula is qualified. The second command is provided to check if your formula have
- More than 50 stars
- More than 20 forks
- More than 20 watchers
- And initialized more than 30 days
Submit pull request
Bravo! It’s really great if you can get here, your formula is qualified. Let’s copy the local formula to your git repo. Example
1
| |
Commit and push your changes to YOUR Github. Then we open the Github Repo (still yours), click on button New pull request and we get


We did it! You only still need the feedback from Homebrew team. You can leave your keyboard and take a cup of coffee. If everything goes well, well done boss! you have just contribute to one of the famous repo in the internet. Congratulations!


